Part 2: Managing My Applications
The My Applications section lets you create sandbox applications, subscribe to APIs, manage credentials, and monitor usage.
Registration uses a 4-step wizard: Application details → API selection → Configuration → Review.
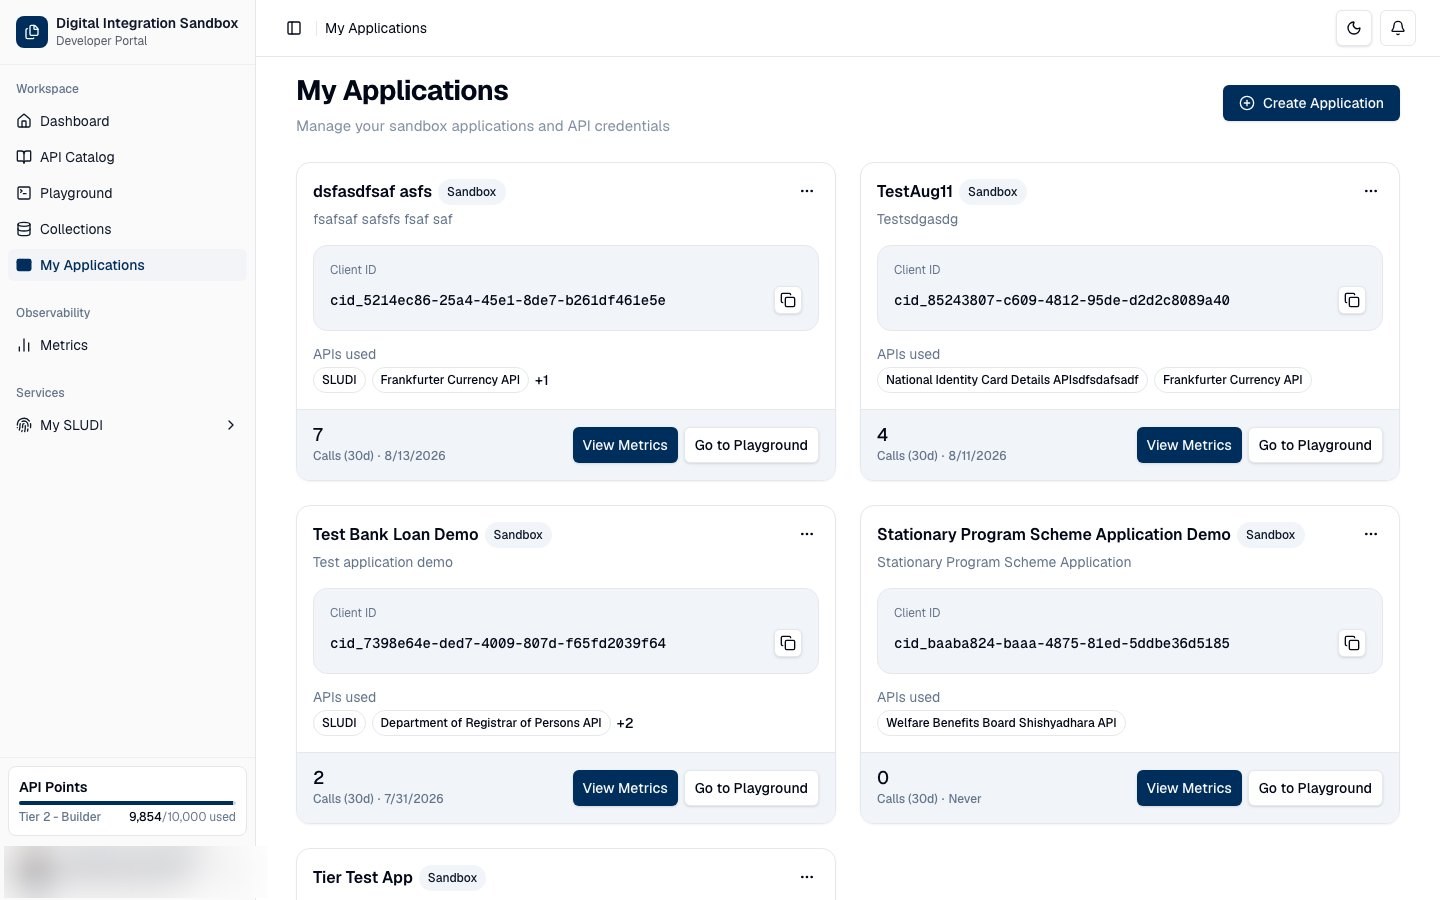
Step 1 — Access Your Applications
On the left-hand navigation sidebar, click on My Applications.
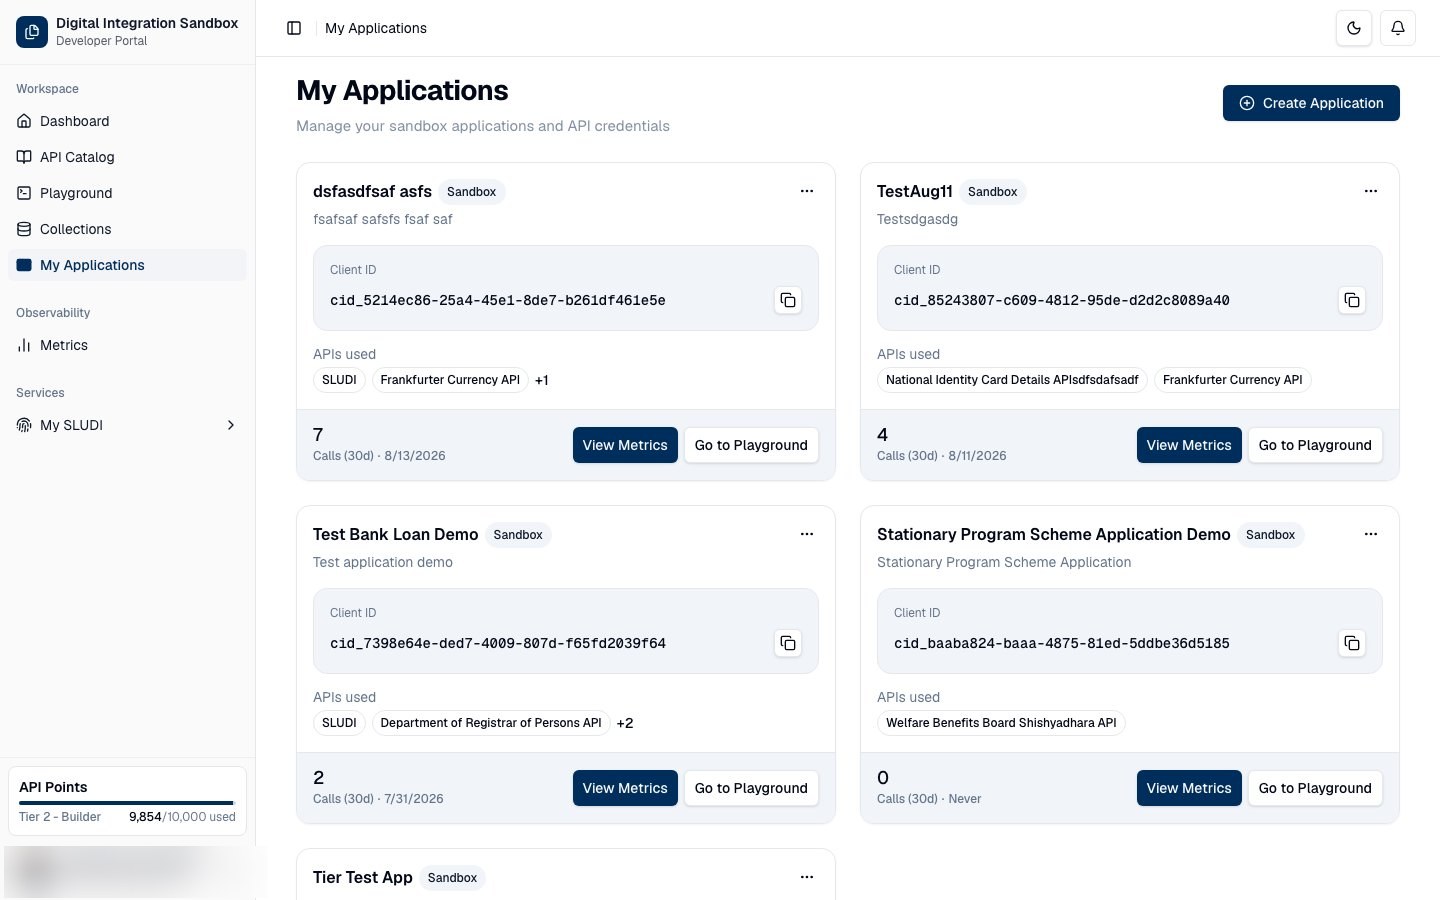
Step 2 — Create a New Application
Click Create Application at the top right of the page.
Step 3 — Application Details
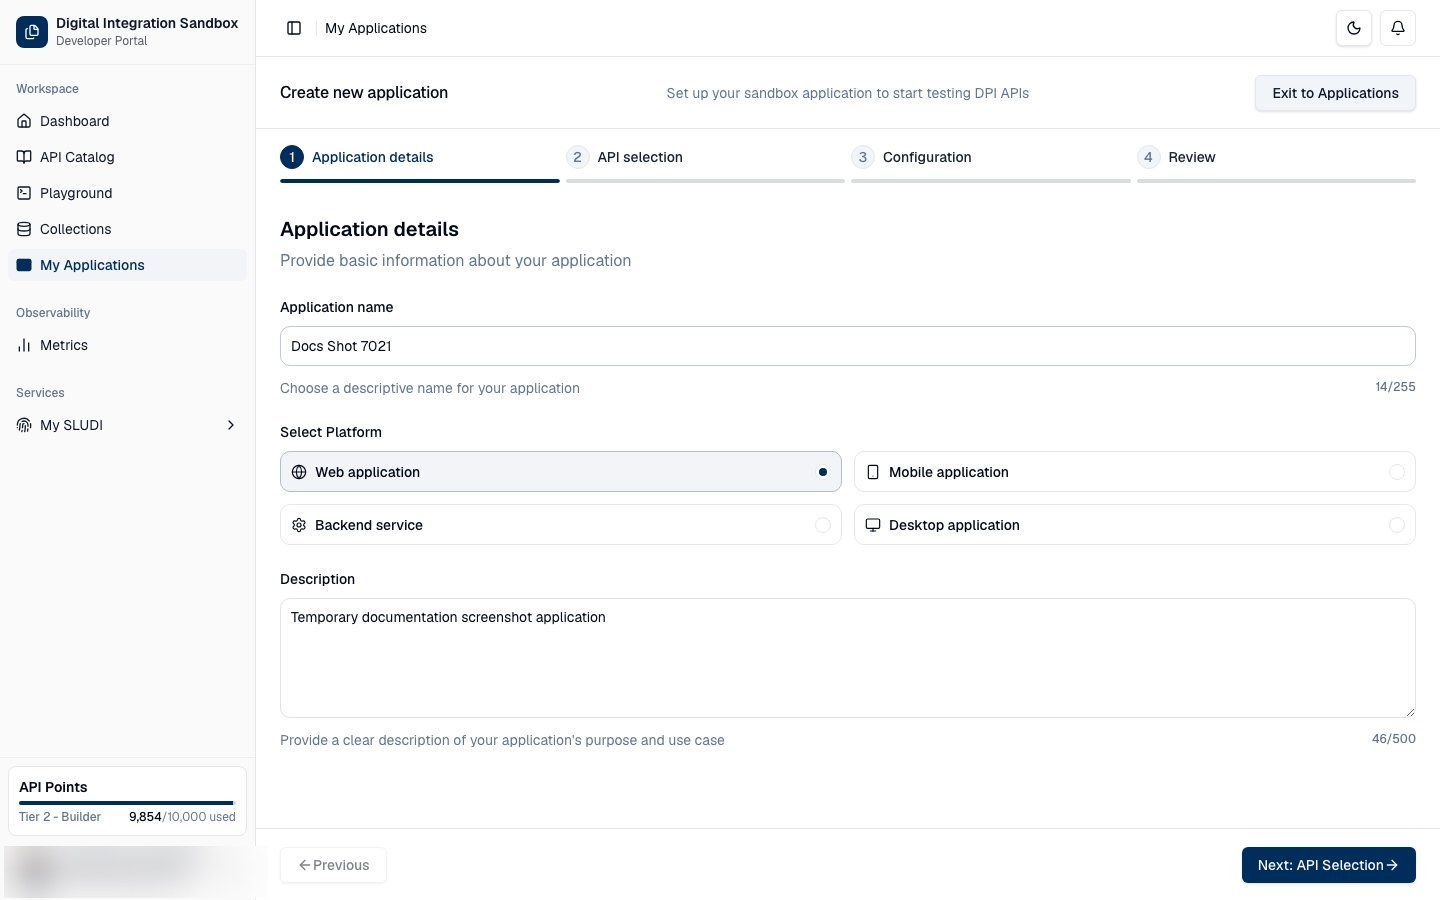
On Step 1 of 4 — Application details:
- Enter an Application name.
- Choose a platform: Web application, Mobile application, Backend service, or Desktop application.
- Add a Description of what the application does.
Click Next: API Selection to continue. You can leave anytime with Exit to Applications.
Step 4 — Select APIs
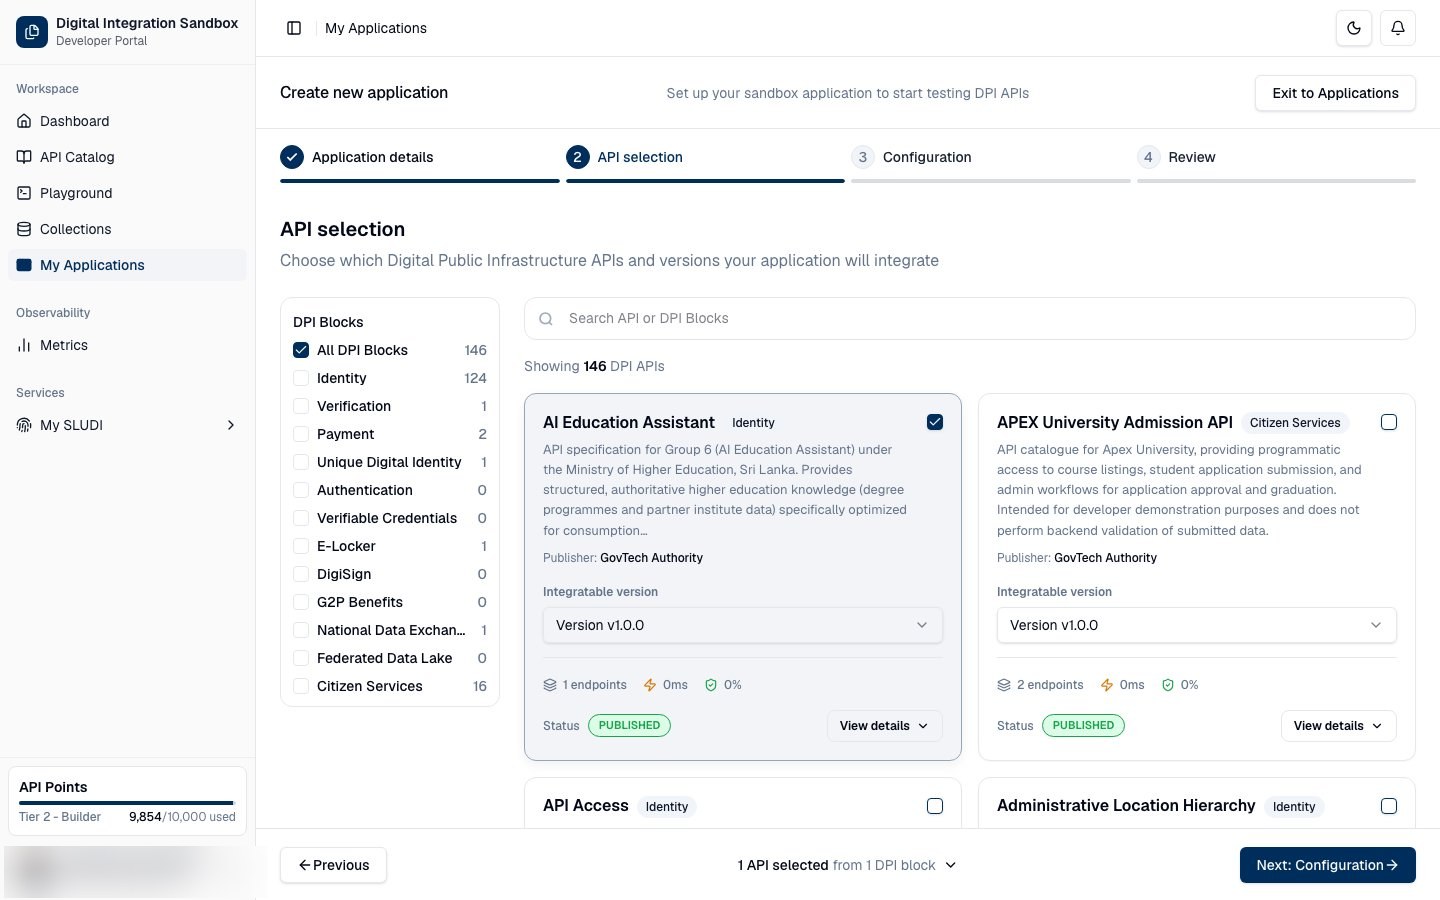
On Step 2 of 4 — API selection:
- Search with Search API or DPI Blocks, or filter with the DPI Blocks sidebar.
- Select at least one API and choose the version you want to integrate with.
- Use Clear all if you need to reset your selections.
Click Next: Configuration to continue (or Previous to go back).
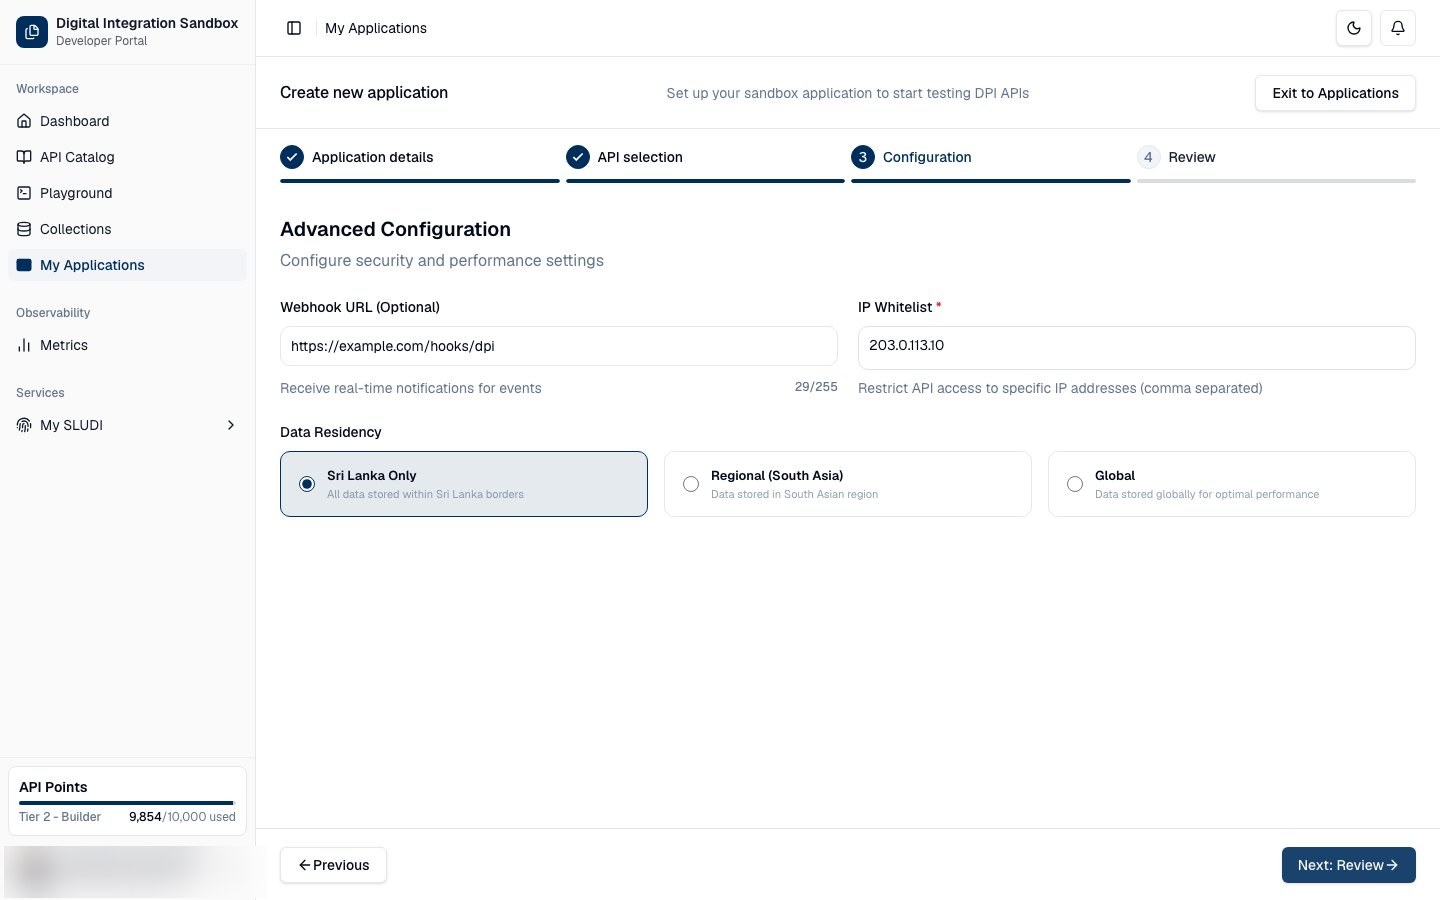
Step 5 — Configuration
On Step 3 of 4 — Configuration:
- Optionally enter a Webhook URL for event notifications.
- Add an IP Whitelist (required) — one or more valid IPv4 addresses, comma-separated.
- Choose Data Residency to match your data sovereignty requirements.
Click Next: Review to continue.
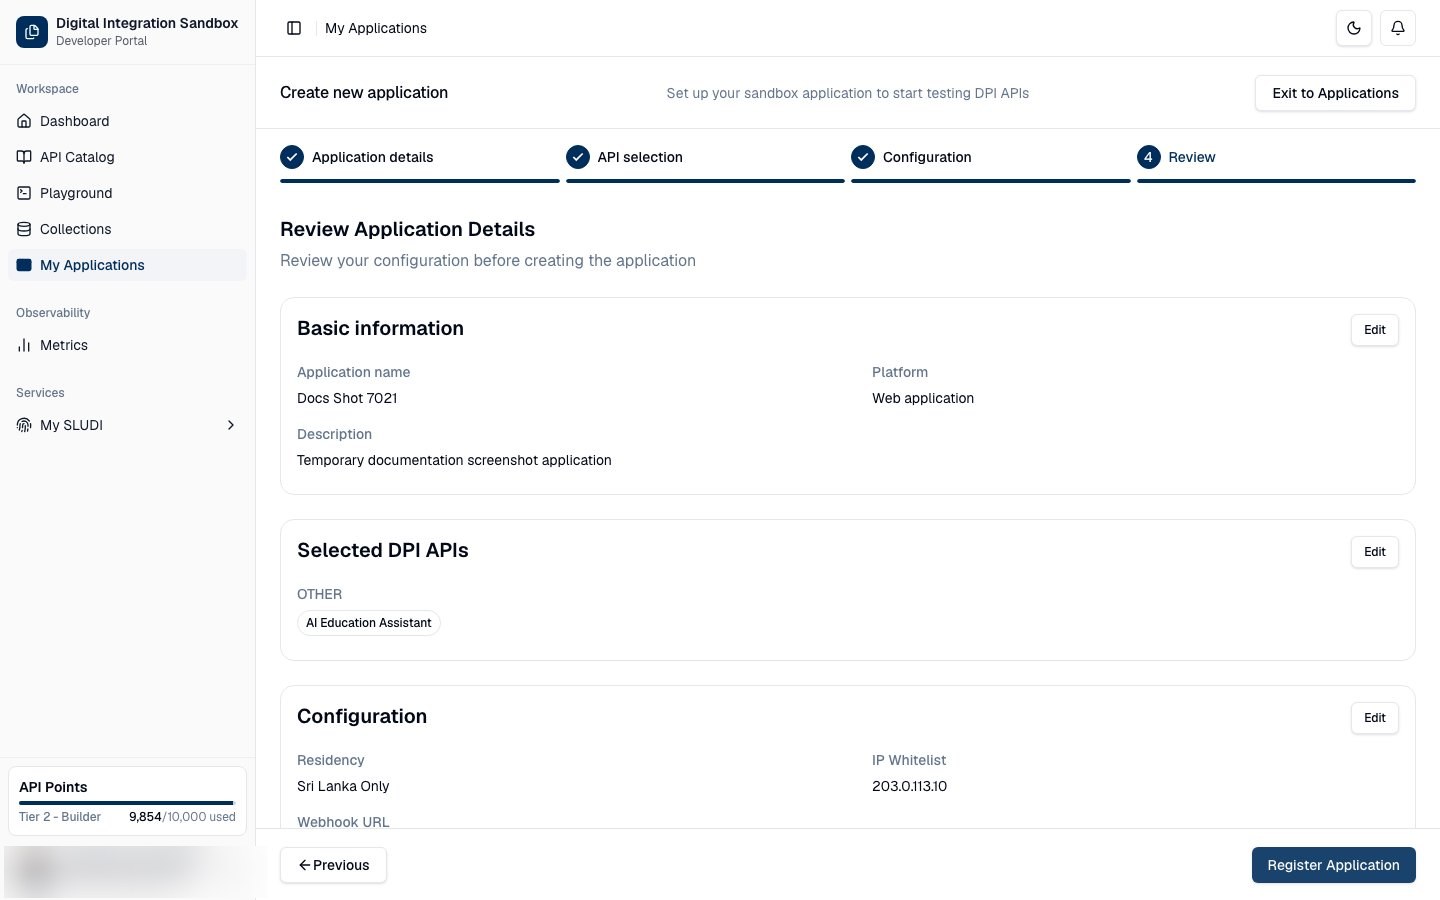
Step 6 — Review and Register
On Step 4 of 4 — Review, check every section. Use Edit on a section if you need to change something.
When everything looks correct, click Register Application.
Step 7 — Secure Your API Key ⚠️
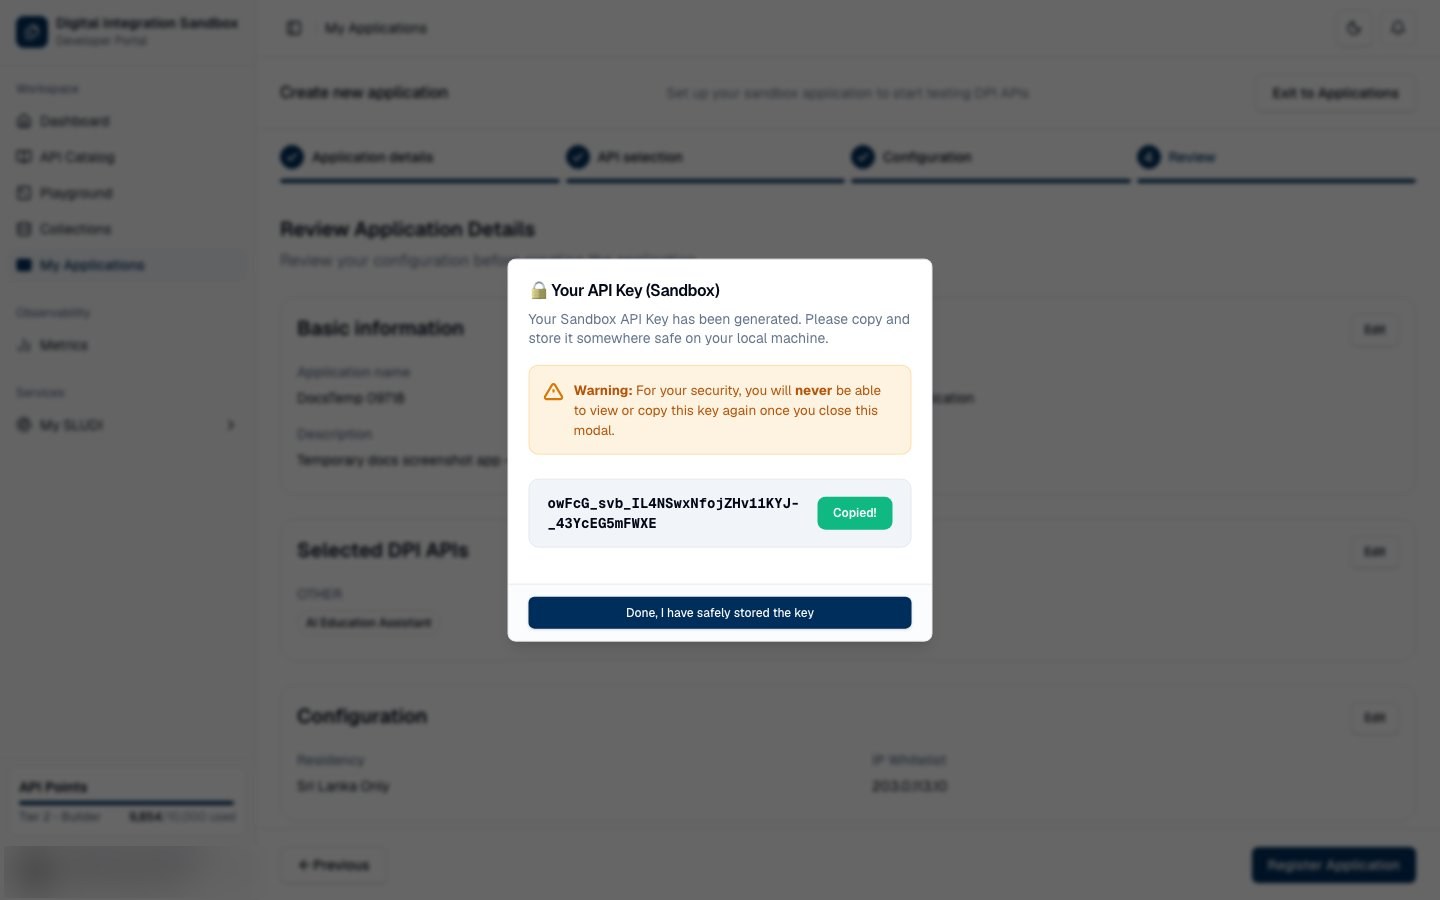
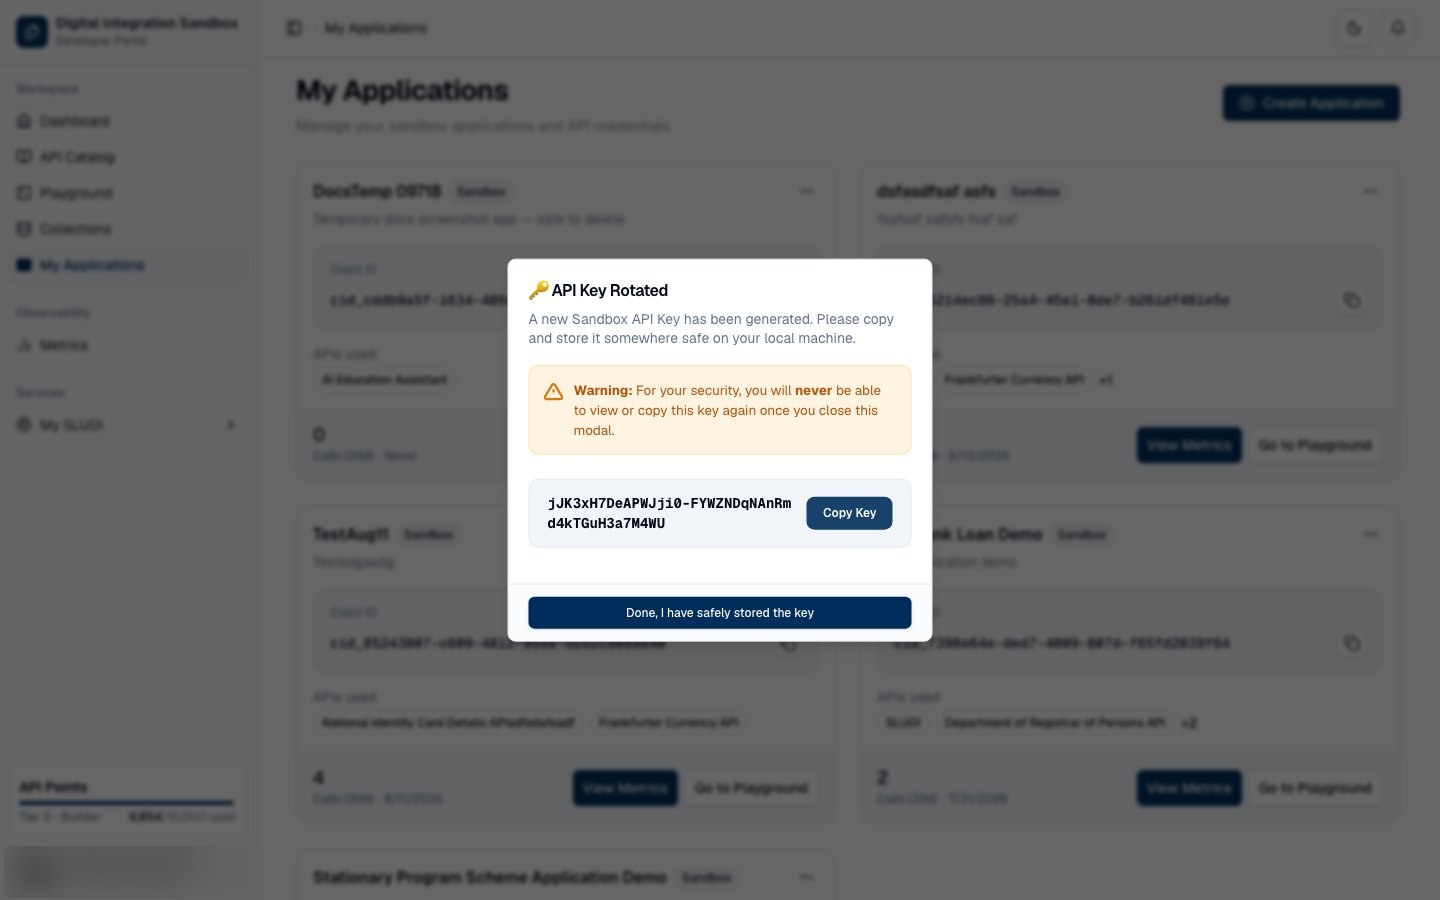
A modal titled Your API Key (Sandbox) shows the key one time only. Click Copy Key and store it in a password manager or secrets vault.
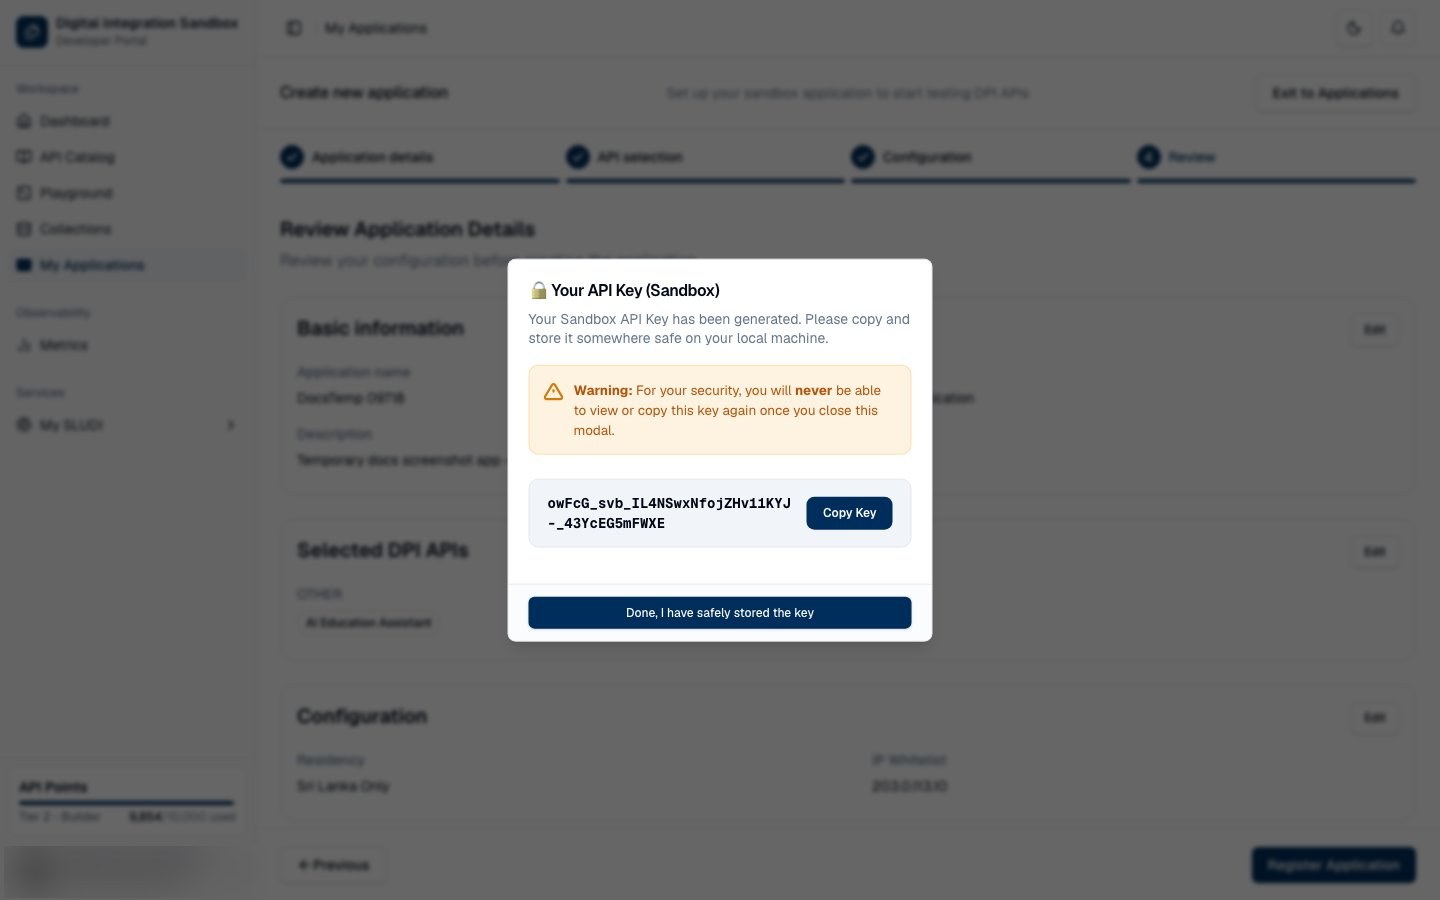
This is the only time the API key is shown. If you lose it, rotate the key from the application card.
After storing the key, click Done, I have safely stored the key.
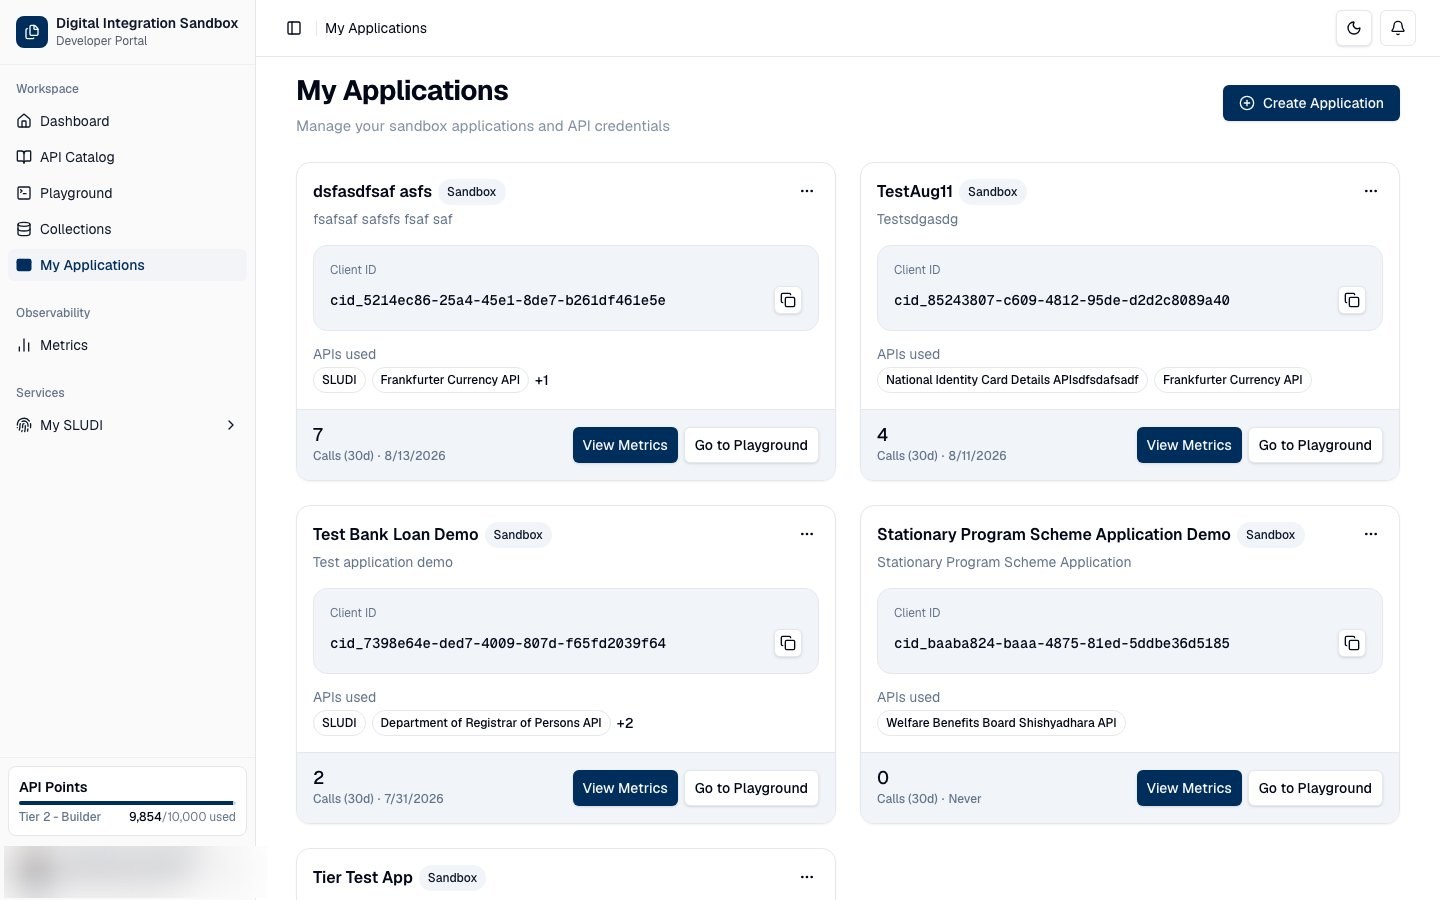
Step 8 — Manage Existing Applications
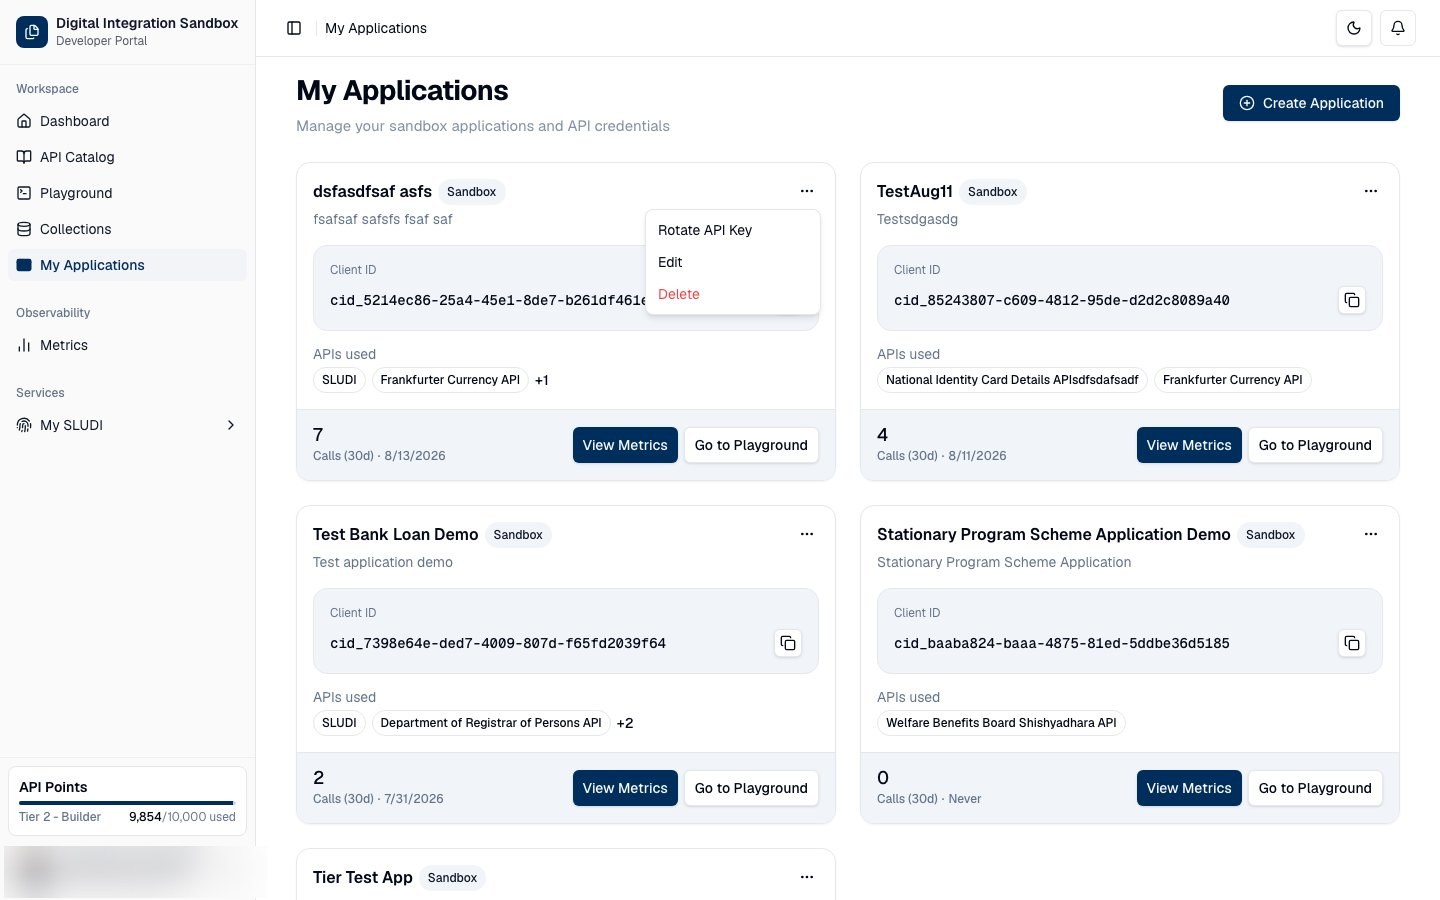
Each application card shows API call volume and created / last-used dates, plus actions such as View Metrics, Go to Playground, Rotate API Key, Edit, and Delete.
Step 9 — Rotate API Key
Click Rotate API Key on an application card if the key may be compromised or you need to re-issue credentials.
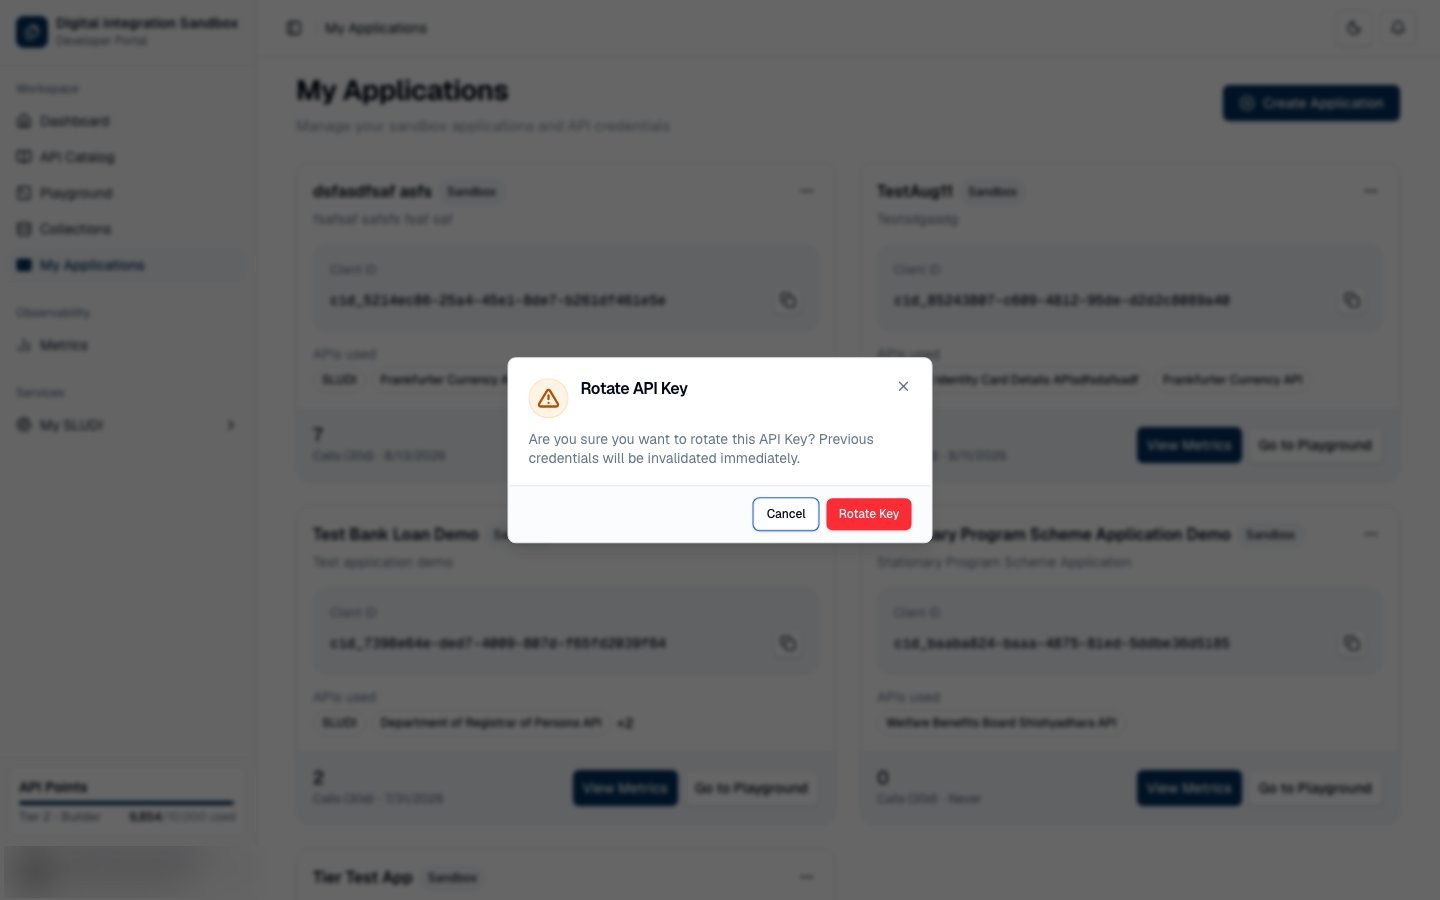
Confirm in the dialog by clicking Rotate Key. Previous credentials are invalidated immediately.
Copy the new key from the API Key Rotated modal, store it securely, then click Done, I have safely stored the key.
Step 10 — Edit Application
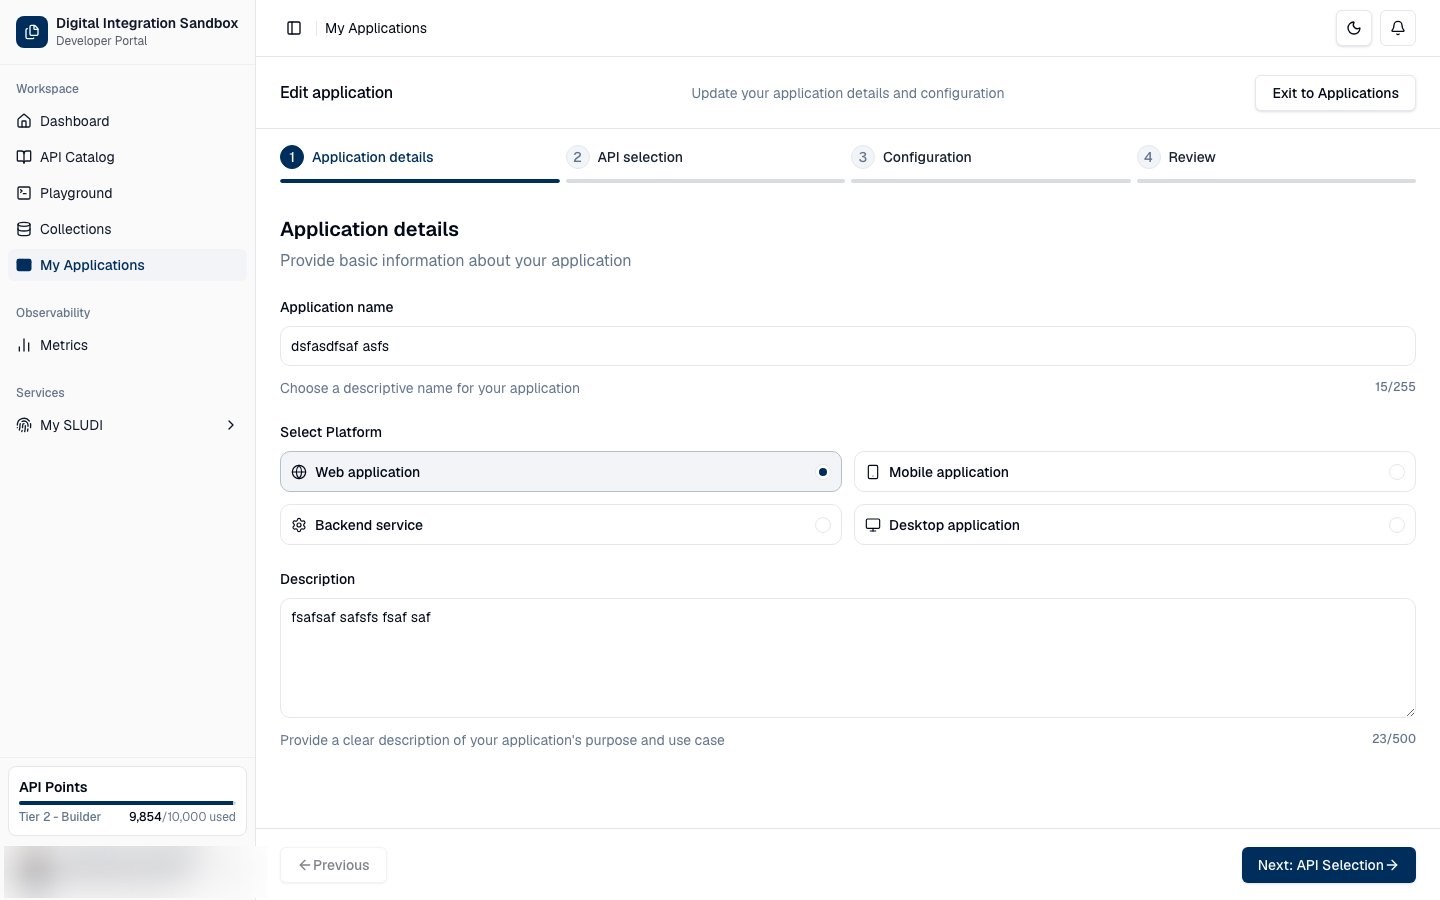
Click Edit to reopen the wizard in edit mode (Edit application). Update details, APIs, or configuration as needed.
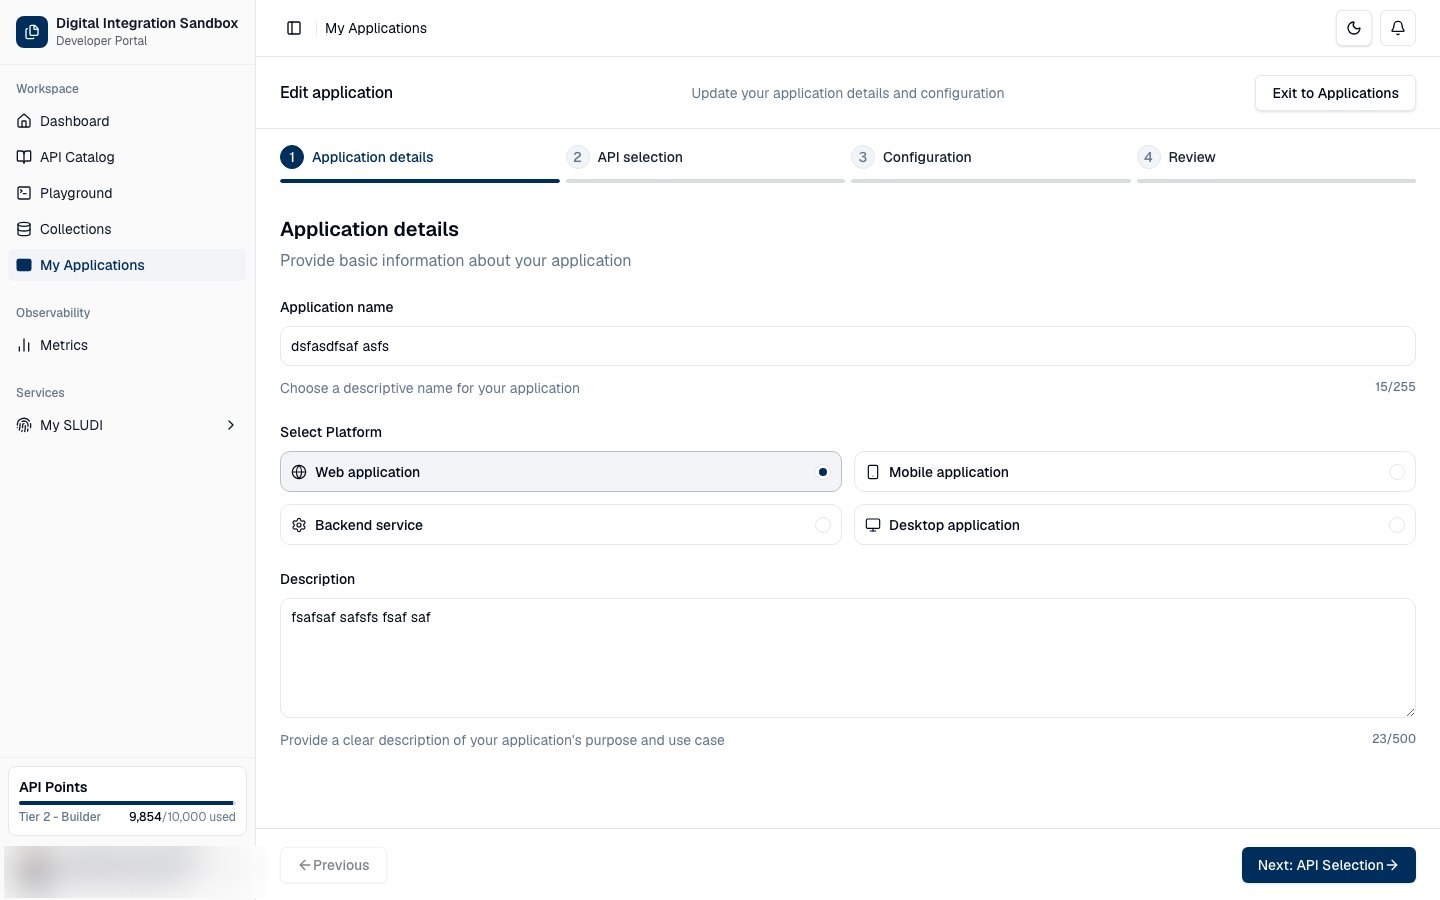
Click Save Changes, then Return to Dashboard when prompted.
Step 11 — Delete Application
Click Delete on an application card to remove it permanently.
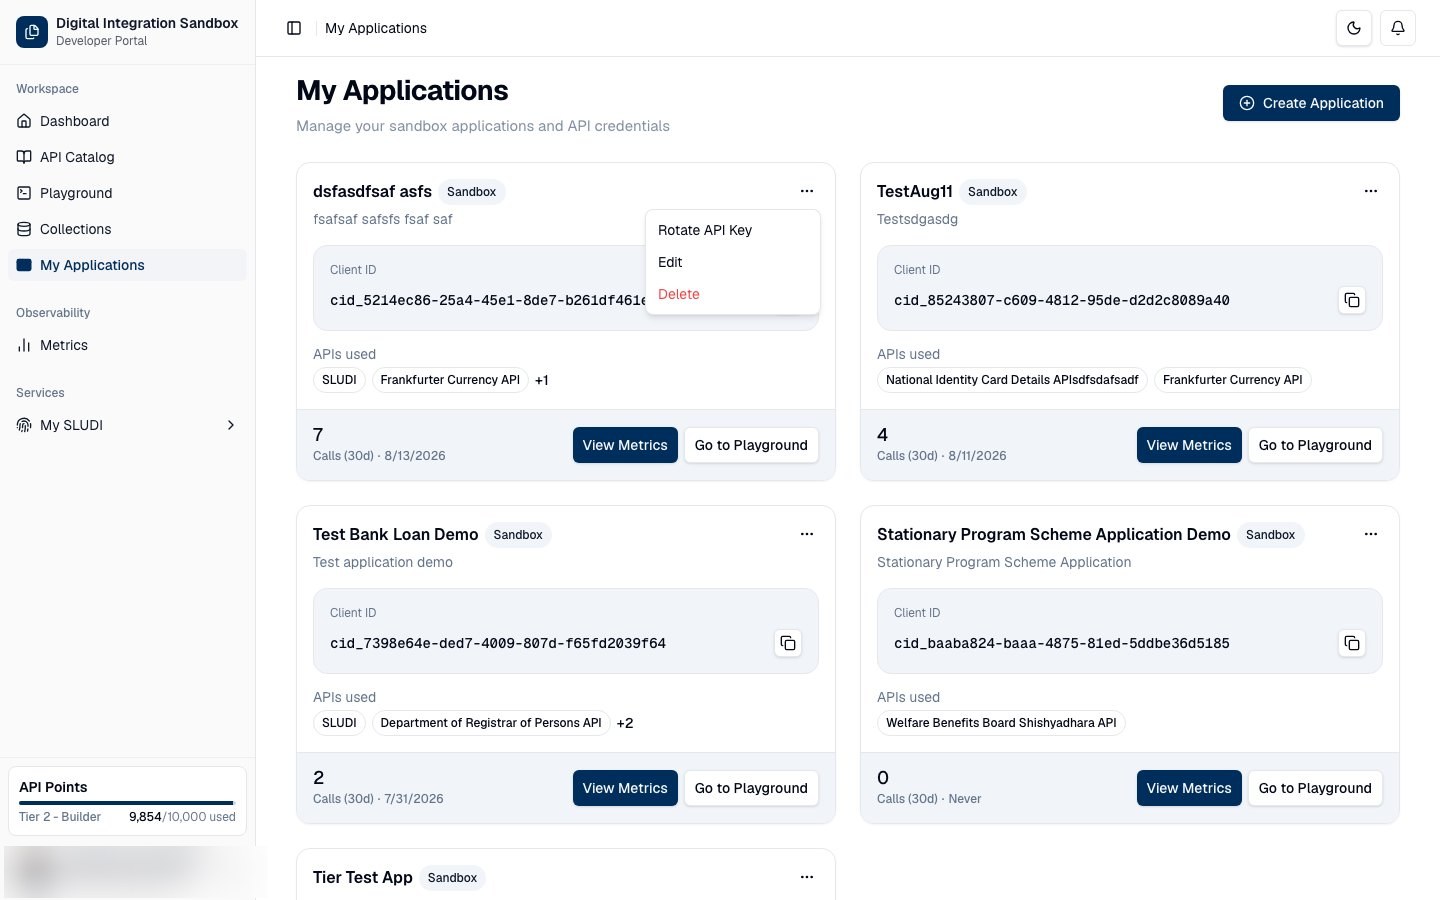
Type the exact application name in the confirmation field to confirm deletion.
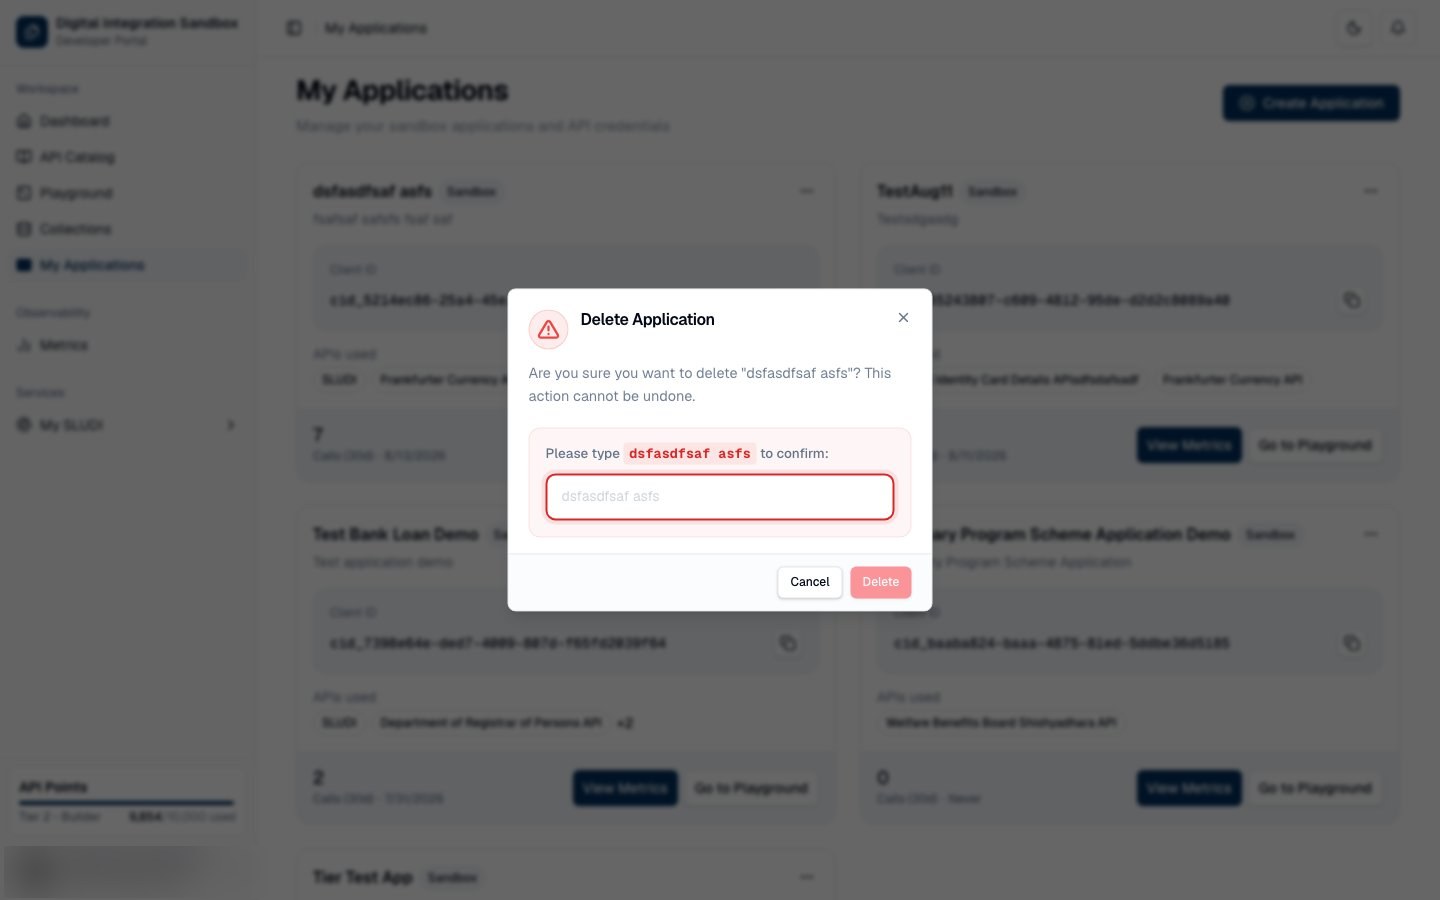
Deletion is permanent and cannot be undone. All sandbox credentials for this application are invalidated immediately.
Previous: Part 1: Exploring the API Catalog →
Next: Best Practices →